
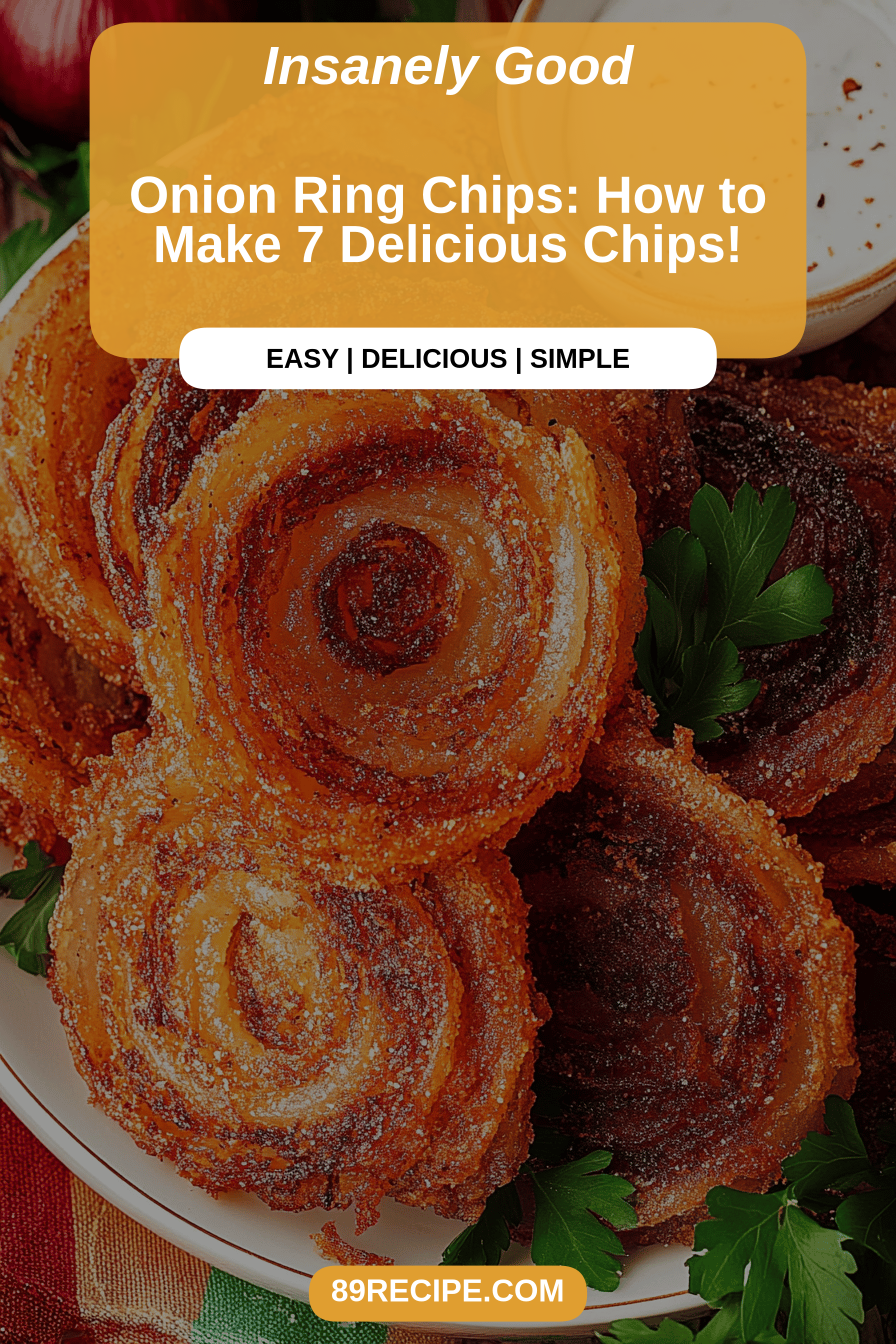
Where do I start with onion ring chips? If you’re anything like me, you’re always on the hunt for the perfect snack. Something that’s got that irresistible crunch, a flavor that just *pops*, and doesn’t take all day. I think I’ve cracked the code. This isn’t just a recipe. Is it a revelation? Is it the snack that will make you the hero of any gathering (or just a quiet night in, curled up on the couch)? The couch – I won’t judge! What is your favorite onion ring? What would you imagine all that deliciousness, but somehow *even better* and transformed into crispy, smoky goodness? What are snackable chips I first tried this recipe at my aunt’s summer BBQ, and my life hasn’t been the same since!
What is this Deliciousness?
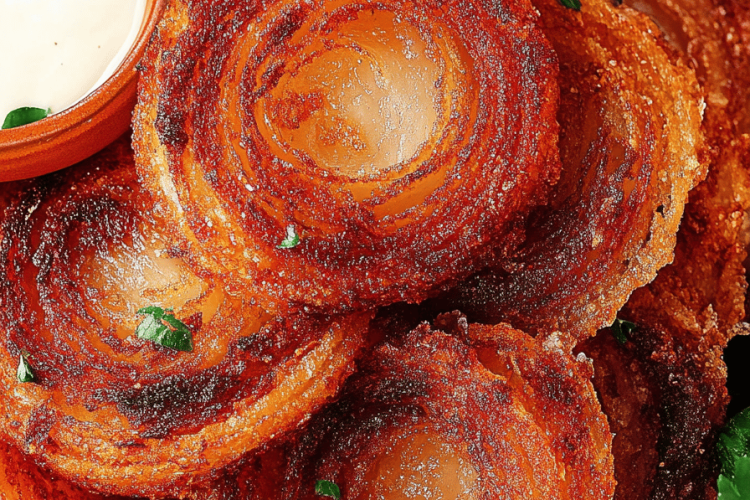
What is an onion ring chip? Think of them as the ultimate upgrade to your regular potato chips. What’s the secret behind onion rings and potato chips? They’re thin, crispy slices of sweet onion, coated in a perfectly seasoned batter and baked (or fried) (see recipe). What is fried? ), until they’re golden brown and utterly addictive. What is the name, well, that came about because they reminded me of the best parts of those classic onion rings? Is there a way to make rings but in chip form? What is the way the sweet onion flavor melds with the savory onion crunch? What are the best dipping sauces? What are some of the best games to play at a party? I need a little something to munch on.
Why you’ll love this recipe?
Where do I start? The sweetness of the onion mellows out during cooking, creating a subtle, yet satisfying base. I’ve been perfecting a special blend of spices for years. The coating, seasoned, delivers an elegant finish. What are some good kicks that keep you coming back for more? Is this recipe surprisingly easy? What are some good ways to save time on a weeknight when you’re craving something yummy but don’t have hours to spare? What time do you spend in the kitchen? What’s all about the prep work, and once that’s done, the baking (or frying) is a breeze.
What is the **cost-efficiency**? Absolutely fantastic! Onions are budget-friendly, and the rest of the ingredients are things you probably already have in your pantry. What is the perfect recipe for a healthy grocery budget without sacrificing flavor? What is the **versatility** Can you serve these onion ring chips as a standalone snack, alongside sandwiches, burgers, or both? Even with your favorite dips. What are some great kids parties ideas? What I love most about this is how customizable it is. Can you experiment with different spices, try different dipping sauces, and even add a touch of heat? For a spicy twist. I know this recipe will become a staple in my house, and I just know it’ll become one in yours too. I’m already dreaming about the next batch!
How do I make onion ring chips?
Quick Overview
What is the magic of onion rings? First, you’ll slice your onions thinly (a mandoline slicer is your best friend here!). What’s the secret to the perfect crunch? How do you coat onion slices? What is the best way to bake a potato until it’s crisp and delicious (or you can fry it, if you prefer). Is it a simple process? I’ve made this recipe countless times, and it always turns out great. What are some good recipes for meal prep?
Ingredients
For the Main Batter:
- 1 large sweet onion, such as Vidalia or Walla Walla (These are best because of their natural sweetness. Choose onions that are firm and free from blemishes.)
- I have tried a gluten-free flour and it works great. I’ve tried it again. What are some tips for a beginner?
- 1 teaspoon baking powder (This is what gives the chips their light, airy texture.) Make sure it’s fresh for best results.)
- 1 teaspoon garlic powder (Adds a savory depth that balances the sweetness of the onion.)
- 1 teaspoon onion powder (Because, well, more onion flavor!)
- 1/2 teaspoon paprika (For a touch of color and a subtle smoky flavor.)
- 1/4 teaspoon cayenne pepper (Optional, but adds a nice kick. Adjust to your spice preference.)
- 1/2 teaspoon salt (Don’t skip this! It enhances all the other flavors.)
- 1/4 teaspoon black pepper (Freshly ground is best)
- 1 cup ice-cold water (This is crucial for a light, crispy batter. Really, make sure it’s icy cold!)
- Oil for frying (If fritting – choose a neutral oil with high smoke point, like vegetable oil or olive oil).
For the Filling:
- What’s your favorite dipping sauce?
For the Glaze:
- (These are not glazed!)

How do I get started
Step 1: Preheat & Prep Pan
How do you prepare your oven to 400°F (200°C)? If you’re frying, fill a deep fryer or large pot with about 3 inches of oil and heat to 350°F. Now grab a baking sheet and line it with parchment paper. Is parchment paper your best friend? What are some of the best cleaning products available in the market? If you don’t have parchment paper, you can grease the baking sheet. While the oven is preheating, it’s time to slice the onions.
Step 2: Mix Dry Ingredients
In a medium-sized bowl, whisk together the flour, baking powder, onion powder and salt. Set aside. Paprika, cayenne pepper (if using), salt, pepper. How do I make sure that the onion ring is evenly distributed? What is the best flavor Give it a good whisk – you want to make sure there are no lumps.
Step 3: Mix Wet Ingredients
In a separate bowl, pour in the ice-cold water. This is important! How does cold water help to keep the batter from absorbing too much oil, which leads to crispier results. I usually start with water and add the batter. Give it a quick stir. This prevents lumps and the batter to get too thick.
Step 4: Combine
Gradually add the wet ingredients to the dry ingredients, whisking constantly until just combined. Do not overmix! A few lumps are okay. Overmixing can make the flour hard. How do I make pancake batter? I usually test this with my finger – I stick it in the batter and see if it leaves a thick coating.
Step 5: Prepare Filling
Is there a filling in this recipe? If you’re going to fry, make sure your oil is at the correct temperature (350°F). How important is the temperature. If the oil isn’t hot enough, the chips will absorb too much oil and become soggy. If it’s too hot, they’ll burn on the outside before cooking through.
Step 6: Layer & Swirl
What is the fun part? Dip each onion slice into the batter, ensuring it’s fully coated. Shake off any excess batter, and lay the coated onion slices in a single layer on the prepared pan. If frying, add onion slices to the hot oil, being careful not to burn them.) To overcrowd the pot. If baking, try to give each slice a little space. This ensures they crisp up nicely.
Step 7: Bake
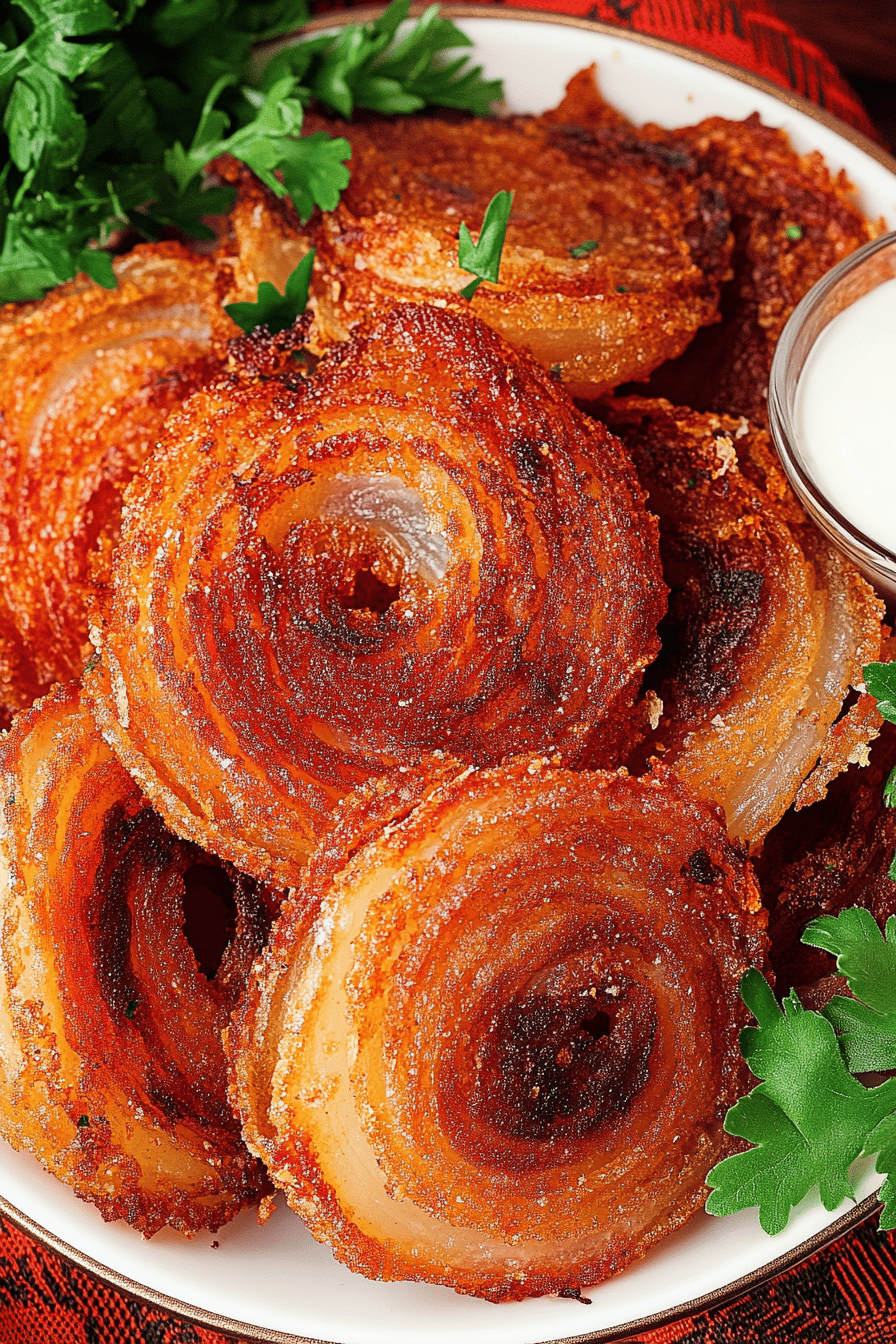
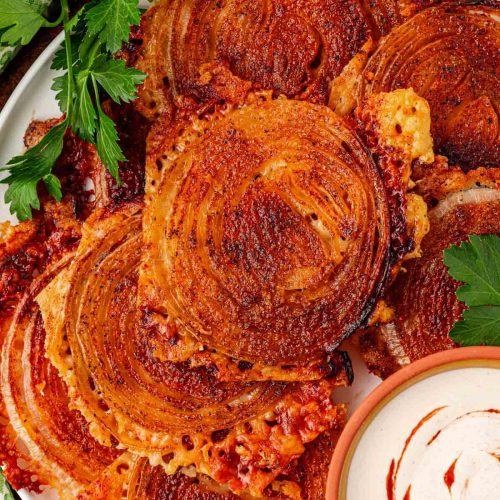
If baking, bake for 15-20 minutes, or until the **onion ring chips** are golden brown and crispy. Keep an eye on them during the last few minutes, as baking times can vary depending on your oven. If frying, fry onion slices in batches for 2-3 minutes per side, until golden brown and crispy. Remove them with a slotted spoon and place them on an ungreased plate lined with paper towels to drain excess water.
Step 8: Cool & Glaze
Is it necessary to cool and glaze? If you’re baking, let the chips cool on the baking sheet for a few minutes after removing them from the oven. How do you remove a potato from the oven? This allows them to crisp up even further. If frying, let the chips cool on the paper towels to remove excess oil. If you want to serve chips on a serving plate, transfer them to the plate.
Step 9: Slice & Serve
Serve these beauties immediately! If you’re anything like me, you won’t be able to resist grabbing a few straight off the baking sheet. (or out of the fryer! ) These **onion ring chips** are best enjoyed warm, when they’re at their crispiest. I love serving these with my favorite dipping sauces. What are some of the best chips to serve with your favorite sauces?
What should I serve it with?
What are some of the best onion ring chips? What are the serving options?
For Breakfast: You might think, “Onion ring chips for breakfast?” but trust me, it works! Serve them with a side of scrambled eggs and bacon for a hearty, savory start to your day. A Bloody Mary would make a great pairing, too.
For Brunch: Brunch is the perfect excuse to get a little fancy! Arrange the chips artfully on a platter, alongside a selection of your favorite dips (think ranch, spicy mayo, or even a creamy blue cheese). Pair them with mimosas or a refreshing Aperol spritz. It’s guaranteed to be a hit!
As Dessert:What are some of the best chips for a late night snack? Serve with a sweet dipping sauce, like honey mustard or maple syrup. What is so good about
For Cozy Snacks:Sometimes you just need a quick snack. What are some of the best recipes for a movie night? Serve them with a glass of wine, or just with tea. My family loves them as a side for just about everything – burgers, sandwiches, you name it!
How do you perfect an onion ring?
After making these **onion ring chips** countless times (and trust me, I’ve made a *lot*), I’ve learned a few tricks that will help you make them even better.
Onion Selection: The quality of your onions makes a huge difference! Use sweet onions, like Vidalia or Walla Walla. They’re naturally sweeter and have a milder flavor, which makes them perfect for this recipe. Make sure the onions are firm to the touch.
Moisture is Key: This is the most important. Make sure your onions are dry. I recommend patting the onion slices dry with a paper towel after slicing. Excess moisture can make the chips soggy.
Mixing Advice: Don’t overmix the batter! Overmixing develops the gluten in the flour, resulting in a tougher texture. Mix the wet and dry ingredients until just combined, with a few lumps remaining.
Frying vs Baking: If frying, make sure your oil is at the right temperature. If it’s not hot enough, the chips will absorb too much oil and become greasy. Use a thermometer to ensure it’s at 350°F (175°C). If you choose to bake the chips in the oven, be sure to keep an eye on them, as every oven cooks differently!
Ingredient Swaps: Want to go gluten-free? No problem! I’ve successfully used a gluten-free all-purpose flour blend with great results. The texture is slightly different, but they still get wonderfully crispy. For a spicier kick, add a pinch of cayenne pepper to the batter. I’ve tested the recipe with different flours, and I found that rice flour and tapioca flour works better than almond flour for the best texture!
Baking Tips: If baking, make sure you don’t overcrowd the baking sheet. Give the **onion ring chips** some space so that they can crisp up properly. Use parchment paper for easy cleanup! Another great tip: flip them halfway through baking to ensure they’re crispy on both sides.
Glaze Variations: You don’t need a glaze for this recipe, but you can experiment with different dipping sauces! I like to make a simple aioli with mayo, garlic, and lemon juice. A classic ranch is always a good choice, too. For the best result, get creative and experiment with flavors you love!
Storing and Reheating Tips
These **onion ring chips** are best enjoyed fresh, but if you have any leftovers (which is unlikely!), here’s how to store and reheat them:
Room Temperature: If you plan to eat them within a few hours, you can leave them at room temperature, but make sure they are not exposed to heat. Place them in a single layer on a plate or platter to keep them crispy.
Refrigerator Storage: For longer storage, place the cooled chips in an airtight container. They will stay fresh for up to 2-3 days. The downside is that the chips will lose some of their crispiness.
Freezer Instructions: Freezing isn’t ideal, as it can affect the texture. However, if you really want to freeze them, lay them in a single layer on a baking sheet and flash-freeze them for about an hour. Then, transfer them to a freezer-safe bag or container. They can be stored for up to a month.
Reheating: The best way to reheat them is in the oven at 350°F (175°C) for a few minutes, or until they are crispy again. You can also use an air fryer for a quicker reheat. If you are in a hurry, you can microwave them, but they will be a little less crispy.
Frequently Asked Questions
Final Thoughts
So there you have it – my absolute favorite **onion ring chips**! This recipe is a testament to how something simple can be absolutely incredible. I hope you love this recipe as much as my family and I do. It’s a surefire way to impress any crowd, satisfy those snack cravings, and put a smile on everyone’s face. If you’re looking for something different, try our recipe for garlic parmesan chips. I truly believe that cooking should be a joyful experience. If you give this recipe a try, I’d absolutely love to hear what you think! Leave me a comment below with your experience and any tips you might have. Happy baking, everyone!
Onion Ring Chips
Ingredients
Main Ingredients
- 1 large Yellow Onion
- 1 cup All-Purpose Flour
- 0.5 teaspoon Paprika
- 0.25 teaspoon Garlic Powder
- 1 teaspoon Salt
- 1 cup Vegetable Oil
Instructions
Preparation Steps
- Slice the onion into thin rings.
- In a bowl, combine flour, paprika, garlic powder, and salt.
- Add the onion rings to the flour mixture and toss to coat evenly.
- Heat the vegetable oil in a large skillet over medium-high heat.
- Carefully add the onion rings to the hot oil and fry until golden brown and crispy, about 2-3 minutes per side.
- Remove the onion rings from the oil and place them on a paper towel-lined plate to drain excess oil.
- Serve immediately.