Remember those days when you just had to have something chocolatey and delicious, but didn’t want to eat it? What is it like to spend hours in the kitchen? What are the best Texas Sheet Cake Brownies? I stumbled upon this recipe ages ago, probably during one of my late-night sweet cravings, and it’s amazing. Has been a lifesaver ever since. What are the fudgy brownies? Chocolate flavor, with a dreamy glaze that’s beyond compare. Plus, it’s practically a one-bowl wonder, so the cleanup is incredibly easy! Is this a mashup of the classic Texas Sheet Cake, but in brownie form? What are brownies for sharing with your friends and family, or keeping all to yourself? What is the best recipe for a million dollars but takes hardly any time to make? What are brownies like? What makes this brownie better than a boxed brownie?

What are Texas sheet cake brownies?
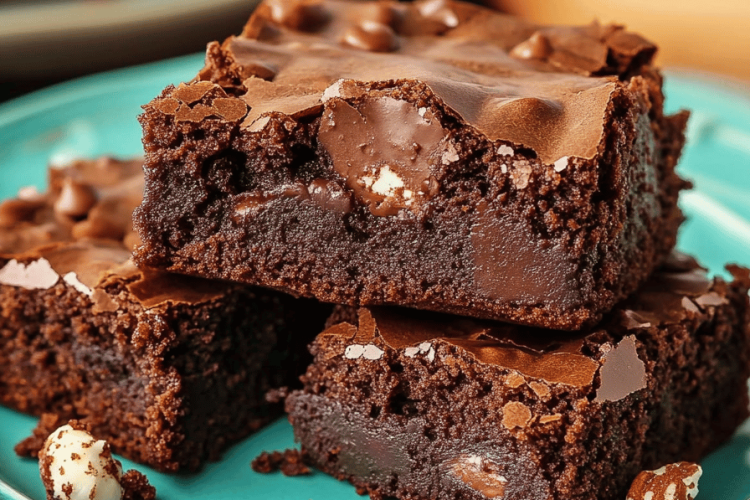
Texas Sheet Cake Brownies are the cool, easygoing cousin of the traditional Texas sheet cake. What is the classic brownie? Is it a brownie that’s got an ultra-moist and fudgy texture, topped with rich, creamy chocolate? Chocolate glaze, similar to the top of the sheet cake, but adapted to a brownie! What is a perfectly sized sheet of chocolate? What is the origin of the word ”spani’ What would happen if we made Texas sheet cake but in brownie form? ” And honestly, it’s genius. You get the best of both worlds: a good and bad. The ease and speed of brownies, plus the amazing flavor and topping of the Texas Sheet Cake. No complicated layers, no fussy techniques – just a big, beautiful pan of pure chocolate joy. What’s a good treat for Tuesday night? What is a recipe about simple ingredients that magically turn into something?
Why you’ll love this recipe?
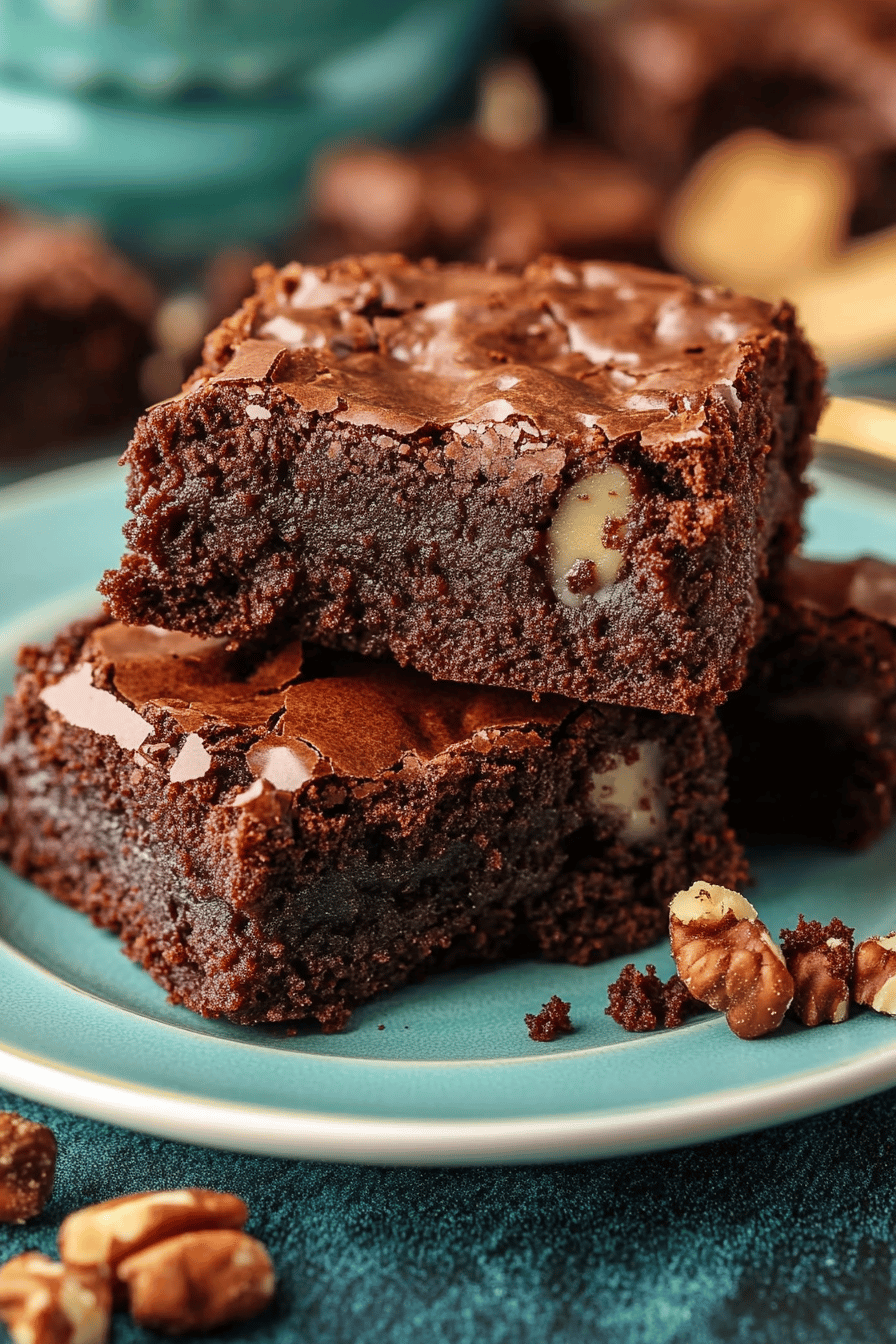
Oh, where do I even begin? First of all, the **flavor** is absolutely incredible. These brownies are incredibly rich and chocolatey, with a subtle hint of vanilla that really enhances the overall taste. The glaze on top just takes it to the next level, adding a creamy, decadent finish that you’ll be craving long after the last bite. They have a soft, fudgy interior, and the glaze just perfectly complements the brownies. It’s the kind of dessert that satisfies any chocolate craving. Then there’s the **simplicity**. Seriously, this recipe is a breeze. It’s all mixed in one bowl (yesss to less dishes!), and baked in a single pan. It’s way easier than many other brownie recipes or even making a traditional layer cake. Honestly, the hardest part is waiting for them to cool! And, talking about the ingredients – it’s pretty **cost-efficient**. You probably have most of the ingredients in your pantry already. It’s a perfect option when you want something special without breaking the bank. And here’s the best part – the **versatility**! You can easily customize these to your liking. Add some chopped nuts to the batter, drizzle with different flavors, or even change up the sprinkles on top. The options are really endless. What I love most about this is the fact that it’s a crowd-pleaser. I’ve brought these to countless gatherings, and they disappear almost instantly. They’re perfect to bring to a party, for a bake sale, or even just for a cozy night at home. They always get rave reviews! It’s my secret weapon for any occasion that calls for something sweet and satisfying. The secret? No complicated techniques, just pure chocolatey goodness.
How do I make Texas Sheet Cake Brownies?
Quick Overview
What is the best way to break this down: Is it really First, you’ll mix your dry ingredients, then your wet ones, combine them, and pour them into a pan. While the brownies are baking, you’ll whip up that luscious glaze. Once the brownies have cooled, pour the glaze on top. Is it as easy as it sounds? The glaze seeps down into the brownies, creating a heavenly, melt-in-your-mouth experience in every bite. What is a no-fuss recipe that yields incredible results? How do you make something so delicious and impressive? What is the best way to make a brownie?
Ingredients
For the Main Batter:
- 2 cups all-purpose flour: 1 cup all purpose I prefer using unbleached all-purpose flour for a slightly better texture, but regular works. Is it perfectly fine too?
- 2 cups granulated sugar: The sugar is your sweetening agent.
- 3/4 cup unsweetened cocoa powder: 1/4 cup. Dutch-processed cocoa powder gives a richer, deeper chocolate flavor.
- What is the recipe for baking soda brownies? Make sure it’s fresh for the best results.
- 1 teaspoon salt: This balances sweetness and enhances the chocolate flavor.
- 1 cup buttermilk: It will add moisture and a slight tang. If you don’t have buttermilk, you can use 1 cup of milk plus 1 tablespoon of white vinegar or lemon. Let it sit for a few minutes to curdle before adding it to the recipe.
- 1/2 cup vegetable oil: Any neutral-flavored oil, like canola or sunflower oil will work.
- Two large eggs: These will add richness and structure.
- 1 teaspoon vanilla extract: Adds a lovely flavor.
- 1 cup boiling water: 2 cups. This helps bloom the cocoa powder, intensifying the chocolate flavor and creating a fudgy texture.
For the Filling:
- N/A
For the Glaze:
- 1/2 cup (1 stick) unsalted butter: Adds richness and texture to the glaze.
- 1/2 cup unsweetened cocoa powder: For a deep chocolate flavor.
- 6 tablespoons milk: This gives the glaze the right consistency.
- 1 teaspoon vanilla extract: For added flavor.
- 3 cups powdered sugar: This is the base of glaze. Sift it to remove any lumps.
Step-by-Step Instructions
Step 1: Preheat & Prep Pan
First things first, preheat your oven to 350°F (175°C). Then, grease and flour a 9×13 inch baking pan. I always use a little bit of butter and then dust it with flour – it ensures the brownies come out perfectly! You can also line the pan with parchment paper, leaving some overhang on the sides. This makes it super easy to lift the brownies out of the pan once they’re cooled. Make sure the oven is fully heated before you put the brownies in – this helps them bake evenly. While the oven is preheating, gather all your ingredients – this is a game-changer for a smooth baking experience!
Step 2: Mix Dry Ingredients
In a large bowl, whisk together the flour, sugar, cocoa powder, baking soda, and salt. Make sure everything is thoroughly combined. This is a crucial step for ensuring that the baking soda is evenly distributed. If you notice any lumps in the cocoa powder, be sure to break them up before proceeding – you want a smooth batter. This is a basic step but it’s essential for the best brownie results. Pro tip: I always use a whisk for this step, it helps to get rid of any pesky lumps, and it makes the mixing process so much faster!
Step 3: Mix Wet Ingredients
In a separate bowl, whisk together the buttermilk, oil, eggs, and vanilla extract. If you don’t have buttermilk, remember the milk and vinegar trick! Give it a good whisk until everything is combined. The most important thing here is that your eggs and oil are at room temperature – this helps them mix more smoothly. Don’t worry too much about the temperature of the buttermilk, it doesn’t matter too much in this case. This step is about combining the wet ingredients to then add to the dry ingredients.
Step 4: Combine
Pour the wet ingredients into the bowl with the dry ingredients. Mix with an electric mixer on medium speed until just combined. Then, gently stir in the boiling water. Be careful when adding the boiling water – it will make the batter seem a bit thin, but that’s normal. Make sure you don’t overmix the batter; just mix until everything is combined. Overmixing can lead to tough brownies. Don’t worry if you see a few streaks of flour – it’s better to stop mixing a little early than to overmix and get a rubbery texture. The batter should be smooth and slightly thin. This is what gives these brownies that fudgy texture.
Step 5: Prepare Filling
This recipe doesn’t call for a filling, but it does call for a chocolate glaze, which is the best part! To make the glaze, melt the butter in a saucepan over medium heat. Remove from heat and whisk in the cocoa powder, milk, and vanilla extract. Then, gradually add the powdered sugar, whisking until the glaze is smooth and creamy. If the glaze seems too thick, add a little more milk, a teaspoon at a time, until you reach your desired consistency. Make sure to whisk constantly, so you don’t end up with any lumps. The glaze should be smooth and pourable. Taste it and add a pinch of salt if desired. You can also experiment with different extracts to add other flavors!
Step 6: Layer & Swirl
How do I make brownie batter? Pour the batter into a prepared pan and spread it evenly. No layering or swirling in this recipe. Is this recipe super simple? The magic happens with the glaze, the layering will come when you have the warm brownies and the chocolate melts. Let the brownies cool for a few minutes, then drizzle the glaze over the warm brownie. What is that iconic effect? If you like to have the glaze fully spread out, do so, if you want a certain pattern, be creative!
Step 7: Bake
Bake for 25-30 minutes, or until a toothpick inserted into the center comes out with moist crumbs. Keep a close eye on your brownies during the last few minutes of baking, as ovens vary. If you’re unsure, it’s always better to slightly underbake them than overbake them. You want that perfect fudgy texture, not dry cake. The edges of the brownies should start to pull away from the sides of the pan. If the brownies start to brown too quickly, you can loosely tent the pan with foil to prevent over-browning. This is my tip for a perfect brownie – if it comes out underbaked, it’s still going to be good. If it comes out overbaked… not so much!
Step 8: Cool & Glaze
Let the brownies cool completely in the pan. This is important! As tempting as it is, resist the urge to cut into them while they’re still warm. The cooling process allows the brownies to set and the flavors to meld together. Once they’re completely cool, you can begin to apply the glaze. If you glaze the brownies while they are still warm, the glaze will melt and absorb too much. Make sure to let the brownies cool before applying the glaze. Allow the glaze to set for at least 30 minutes before cutting and serving. I like to let them set in the fridge for a bit for the glaze to harden and become extra tasty.
Step 9: Slice & Serve
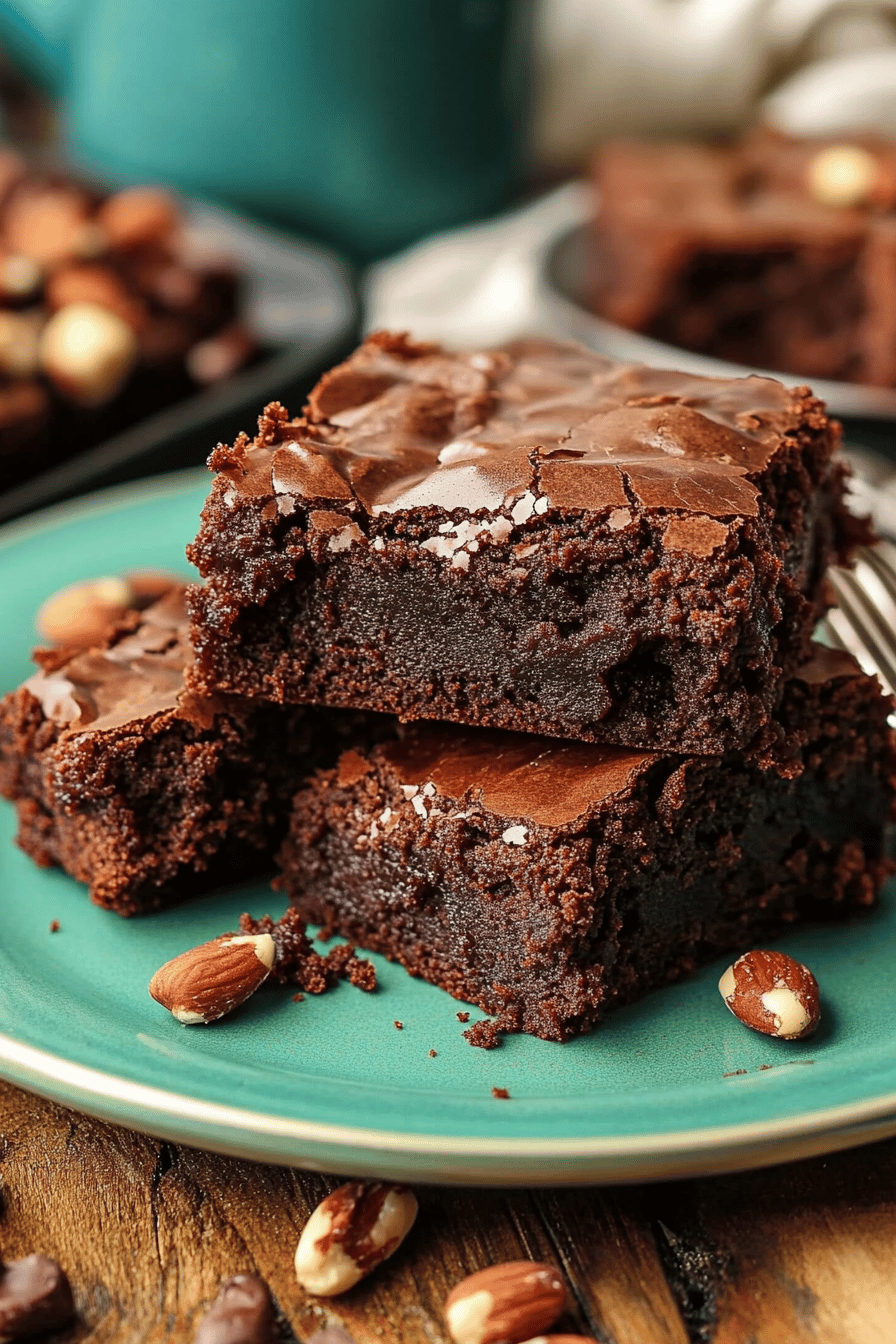
Once the glaze has set, it’s time to slice and serve! I use a sharp knife to cut the brownies. Start by cutting even rows, and then cut the rows into squares. For clean cuts, wipe the knife clean between each cut. What are some of the best brownie recipes ever made? Cut them into squares, or get creative with other shapes! Serve brownies at room temperature, and enjoy your chocolatey treats. For that perfect presentation, you can add sprinkles or nuts on top!
What is the best way to serve it?
Oh, the possibilities! Texas Sheet Cake Brownies are perfect for any occasion!For Breakfast:Why can’t you have brownies for breakfast? Serve them with a cup of coffee or cold milk. What’s your favorite way to enjoy vanilla ice cream?For Brunch:What are some great additions to a brunch spread? What’s a good brunch recipe? Pair it with fresh fruit, yogurt, and mimosas.As Dessert:After dinner, these are the perfect treat. Serve them with a scoop of vanilla ice cream and hot fudge, or whipped up with some fresh fruit. Is chocolate shavings better than cream?For Cozy Snacks:When you’re curled up on the couch, looking for a comfort treat, they’re wonderful with mugs of hot chocolate. What are some good substitutes for a glass of cold milk? My family loves them, and I’m sure yours will too! What are some of the best dinners ever? They are always a fantastic idea. I love to see people happy when they taste my food!
Top Tips for Perfecting Your Texas Sheet Cake Brownies
Alright, here are a few extra tips to make sure your Texas Sheet Cake Brownies are absolutely perfect!
Zucchini Prep: Make sure you grate the zucchini and squeeze out the excess moisture with a paper towel. This prevents the brownies from becoming too soggy. The more moisture you remove, the better!
Mixing Advice: Avoid overmixing the batter. Overmixing can develop the gluten in the flour and cause the brownies to become tough. Mix just until the ingredients are combined.
Swirl Customization: Want to make your brownies extra special? Experiment with different swirl patterns! Once you have applied the glaze, get creative using a toothpick.
Ingredient Swaps: If you want to make these brownies gluten-free, you can substitute the all-purpose flour with a gluten-free all-purpose flour blend. I recommend a blend that already contains xanthan gum.
Baking Tips: Make sure your oven temperature is accurate. Use an oven thermometer to ensure the temperature is correct. If the brownies are browning too quickly, tent the pan with foil.
Glaze Variations: Don’t be afraid to get creative with your glaze! Add a pinch of cinnamon, a splash of coffee, or a teaspoon of peppermint extract to the glaze for a unique flavor.
I also tried adding a teaspoon of instant espresso powder to the batter once, and let me tell you, it was amazing! The coffee flavor really enhanced the chocolate. Trust me, these little tweaks can make all the difference!
Storing and Reheating Tips
Keeping these brownies fresh and delicious is easy!
Room Temperature: Store your brownies in an airtight container or tightly wrapped in plastic wrap at room temperature. They’ll stay fresh for up to 3-4 days.
Refrigerator Storage: For longer storage, you can store the brownies in the refrigerator. Place them in an airtight container, and they should last for up to a week.
Freezer Instructions: You can freeze the brownies for longer storage. Wrap each brownie individually in plastic wrap, then place them in a freezer bag. They can be stored in the freezer for up to 2-3 months.
Glaze Timing Advice: If you’re storing your brownies in the freezer, I recommend glazing them *after* they’ve thawed. This will prevent the glaze from getting too sticky or changing texture during the freezing process.
In my experience, these brownies are so delicious they rarely last long enough to be stored! But it’s good to know you have options. Whether you’re storing them for a day or a month, these tips will keep your brownies tasting fresh!
Frequently Asked Questions
Final Thoughts
So, there you have it – my go-to recipe for the most amazing Texas Sheet Cake Brownies! I really hope you give this recipe a try, because it’s just so easy and the end result is incredible. Those fudgy, chocolatey brownies, topped with that creamy glaze… honestly, it’s pure bliss! If you love this, you should try my other brownie recipes! I make a salted caramel version that is amazing! And, if you do make these, I would love to hear about them! Tell me what you think in the comments below, and let me know if you made any tweaks or variations. Happy baking, my friends! Can’t wait to hear all about how your brownies turn out!

Texas Sheet Cake Brownies
Ingredients
Main Ingredients
- 1.5 cups granulated sugar
- 0.75 cups unsweetened cocoa powder
- 0.5 teaspoon baking powder
- 0.5 teaspoon baking soda
- 0.5 teaspoon salt
- 1 cup buttermilk
- 0.5 cup vegetable oil
- 2 large eggs
- 2 teaspoons vanilla extract
Instructions
Preparation Steps
- Preheat oven to 350°F (175°C). Grease and flour a 9x13 inch baking pan.
- In a large bowl, whisk together sugar, cocoa powder, baking powder, baking soda, and salt.
- Add buttermilk, oil, eggs, and vanilla extract. Beat until well combined.
- Pour batter into the prepared pan and spread evenly.
- Bake for 25-30 minutes, or until a toothpick inserted into the center comes out with moist crumbs.
- Let cool completely before frosting.